Showing posts with label Jim Langley. Show all posts

George Argiris' Ingenious Home-Made Chain Keeper

Here's an ingenious home-made chain keeper that you can make for clamp-on front derailleurs. George Argiris makes them for his bicycles and he sent me this photo and the following instructions on how to make it so I could share them with you. Thanks, George!

Quick disclaimer: You only need a chain keeper if you are certain that your front derailleur is adjusted perfectly, yet the chain still comes off the chainring occasionally when shifting to the smallest chainring. If your chain never comes off, you don't need a keeper. If your chain comes off and you're not sure whether or not your front derailleur is adjusted correctly, have it checked by a pro before adding a chain keeper.

Chain keepers keep the chain on
A chain keeper (they can also be called "chain catchers" and "chain guides" - here's a selection of commercial models) is a little device that rests inboard of the small chainring. Should the chain start to come off the small chainring, the chain keeper bumps it and pushes it back on so it can't drop off.

Chain keepers have become popular because compact cranksets have gotten popular. Compacts have a larger difference between the small and large chainring sizes, which can cause shifting glitches, including throwing the chain off when you shift onto the small chainring. This shouldn't happen on a properly adjusted  matched system - in other words, on a Shimano compact crankset with a Shimano derailleur and shifter.

It provides peace of mind that your chain won't fall off
However, a lot of riders choose to mix and match components. Add that fact to the difficulty of properly adjusting front derailleurs, and it's easy to understand why chains can come off. Now, when a chain does happen to come off, it's usually a simple matter to just shift it back on, soft pedaling until it engages (you don't even need to get off your bike).

But, most riders would rather not have it come off in the first place. Hence the profusion of chain keepers. These days, besides on bikes with compact cranksets, you'll see them on bikes with standard doubles and triples sometimes, too.

George Argiris's ingenious chain keeper
George Argiris' home-made chain keeper
George's home-made model is an elegant design for clamp-on front derailleurs. It cleverly takes the place of the clamp hinge pin and is locked in place as you tighten the derailleur. This gives it such an integrated look you might think it was part of the derailleur right out of the box (click to enlarge the photo).

Plus, it looks far better than having a separate chain keeper attached beneath the front derailleur - especially a plastic one. It also won't collect crud and make the area harder to clean. And it weighs next to nothing. Interestingly, there have been wire chain keepers of various designs since the dawn of the derailleur so it's a proven way to control the chain.


What you need to make your chain keeper
1) From your local hobby shop get a #507 (or 1/8-inch) diameter steel rod (get stainless if you can so it won't rust).
2) The first bend is about 1 1/2 inches from the end, and about a 1-inch bent section at a 30-degree angle, or whatever it takes to reach over to the chainring.
3) The second bend is 1 inch from the bottom of that bend to where you'll cut it off.


Notes
* The measurements and bends may vary slightly. You'll have to check it as you go.
* Get the rod to within 1/8-inch or so from the chain, and it shouldn't really hang down any farther than the chainring.

* If the new hinge pin (your chain keeper) doesn't go in easy, drill out the hinge hole with a 1/8-inch drill bit.
* Don't worry if the new pin feels loose, because once you tighten the clamp onto the seat tube of you bicycle frame, it will hold the pin tight.
* You can adjust your new chain keeper by just nudging it one way or the other before the final tightening.

If you have a braze-on derailleur, RoadBikeRider.com owner/cyclist John Marsh sells an e-article on how to make one that resembles George's quite a bit, but mounts beneath the derailleur mounting bolt. The e-article goes for $4.25 and is available here.

Here's to no more dropped chains! Many thanks to George for sharing this trick bike mod!
Jim

Happy Holidays!

Here's an early cycling Christmas "card" to wish you and yours very Happy Holidays! I find some of the details on this 1886/87 magazine cover fascinating.

I was surprised to see the abbreviation "Xmas" in the title and love the snow-capped, frozen font. Look at how the Os in Book have been turned into bicycle wheels. And, I think the red emblem in the center of the C in Cycledom is a chariot wheel, while the zeros that decorate the C likely represent mileage, since already cyclists took great pride in how far they rode each season and watch-quality striker-style cyclometers were popular.

Notice too that the fellow with the mustache is mounting his ordinary (also called a high bicycle, highwheel, penny farthing), which would have been the popular bicycle at the time. Below on that tranquil road is a tandem tricycle. Women riding highwheels was frowned upon so they often rode tricycles.

Then, depicting the future is a chap with what what I believe is a Rover, one of the "modern" designs that would lead to what we ride today. Finally, the winged wheel at the bottom is the icing on the cake.

Enjoy the holidays!
Jim

Q&A: Fixing Dented Deep-Dish Carbon Wheel & Lacing Spokes

Winter's a great time to get your equipment ready for next season and to work on your mechanical skills, like wheelbuilding. From this week's mailbag, here are two related Q and As with feedback and photos from the cyclists showing their handiwork.

This first question is from my Bicycle Trip/Symantec teammate Miles, who is one of our top 45+ masters racers.

Dented carbon rim
Q: Hope you can help me out, Jim. I wanted to make my race bike even faster with some deep-dish carbon sew-up (tubular) wheels. I did my research and decided to buy some made by Edge, which have a great reputation (FYI, they changed their name to Enve recently).

These are pricey wheels so I decided to search eBay and I found what looked to be the perfect pair at a sweet price.

I won the auction, but when the wheels arrived I was depressed to find a large dent in the front rim. Here's a photo. Did I get ripped off? Should I send the wheels back? They're very true and round and all the spokes are nice and tight. I can't see any other signs of damage but I hate this dent. What would you do?

Thanks!
Miles

A: You said the wheel is very true and round and all the spokes are nice and tight. That's good, Miles. As long as there's no other damage (did you check for cracks in the rim where the spokes enter it?) - the dent is probably only cosmetic damage not unlike when a shopping cart rolls into and dents your car. It's ugly and frustrating, but it won't affect the strength of the wheel.

Tall, deep-dish carbon rims like this are often pretty flimsy. You can squeeze them and make the sidewalls flex a lot so it's easy to see how someone running into the wheels in the race pack could have done this. Or maybe, just putting them in the back of a car and someone putting something on top of the wheel dented it. So, it pays to watch out for stuff like this.

Why don't you bring the wheel over to my home workshop and I'll check it out and see if it's fixable? I'm thinking we can pop it out similar to how you'd get a dent out of a car fender.
Dent removed with a little prying and heat
Miles brought the wheel over and I confirmed that there was no structural damage and that it was nice and true and round - a good reliable wheel with a dent in it. Miles wanted to try to fix the dent himself so I told him to:

Take a smooth tool like a regular screwdriver and put it through the hole in the rim right at the dent and using the tool, gently put pressure beneath to push out the dent until the surface of the rim is flat again.

I told him to have his daughter hold a hair dryer and slightly warm the rim at the dent at the same time he was pushing the dent flat. This procedure worked perfectly as you can see from the photo Miles sent me.

Nicely done Miles! Enjoy your speedy new wheels and I'll see you at the San Bruno Hillclimb next month. Jim
---------------------------------------------------------------------

Q: Hi Jim,
I'm a bike tech at REI part-time, as well as a DIY working on my motorbikes, and of course, a cyclist/racer.

I'm building a couple of wheels, and it would be great if I had a jig to hold the hub upright while I'm lacing the spokes. Do you know of any simple jigs that are made for this purpose? The jig should be able to adapt to a wheel with a solid or quick-release axle.

Thanks,
Ronyd

A: You might need to explain a little more in order for me to think about it and see if I can think of a jig that would help you out, Ronyd. Because the way I build wheels doesn�t require a jig until I start truing and tensioning.

I fan the spokes and drop them in
To place the spokes in the hub, I hold the hub in my hand so that I can use gravity and let the spokes drop into the spoke holes. I put the first set of 8 or 9 spokes in one side of the hub. Then I place the first spoke in the rim and attach a nipple.

Next I hold the rim and lace the other spokes in that batch to the rim. This partially built wheel becomes the jig and I drop each set of spokes in and lace them up until all the spokes are in the wheel.

This is a super-fast way to lace up a wheel and you�re always holding the hub or the wheel so you have an easy time controlling things. I don�t know if you saw this page on my website, but it has photos that should give you an idea of the wheelbuilding process I follow.

I�m not saying you have to build a wheel the way I do. I�m just explaining why I don�t have a jig idea for you. Maybe if you describe your technique I can think of a jig that might work for you.

I did work with a mechanic once who wanted to drill a hole in his workbench so that he could put the hub�s axle in it to stand up the hub because he liked to place all 36 or 32 spokes in the hub first and then lace up the wheel once all the spokes were in the hub. That�s the way the Schwinn bike mechanics school taught mechanics to build wheels, but I always found it confusing for people.

But maybe a simple piece of wood with a hole in it for the axle would work for you? The wood could be C-clamped to a workbench so you could put it wherever you need it.


Jim

Ronyd's wheel-lacing jig
Ronyd replied:
Jim - Looks like you hit it on the head in your last paragraph. I too, was taught to drop in all the spokes, and then start lacing, drive side first.

A couple of things I noticed: first, is now you have too many spokes hanging. Secondly, I found myself bending the spokes over to the correct position before I could actually do the crossover.

So, I decided to either go with Barnette's technique, doing 4 groups, flipping the rim over for each group. Or, try your method. Either way, sounds like it's freehand.

I'll experiment and see what work best for me. Thanks for the advice. In the meantime, I built this simple jig this morning for a few bucks out of plumbing pipe and flanges and it's doing the trick.
Ronyd

Thanks for the photo, Ronyd. Your jig looks perfect! Have fun building those wheels.
Jim

More Lights: Early Bicycle Lamps

To enlighten you a bit more, here are a few cool vintage bicycle light items from the early days. It's fun to think that even in the 1890's - years before automobiles were being mass produced, we wanted to ride at night and see and be seen. And, the vintage lights that illuminated the way via an elegant orange beam created by a burning wick, were as magnificent as the lovely bicycles that carried them.

Behold the 20th Century 1898 Model (note that they call it a "Driving Lamp," cyclists being the first drivers).
Next is the same model, but here they show an alluring nighttime riding scene depicting the powerful Model 1898, "splendid in its improvements," allowing the cyclist to make good use of the half of his cycling time that's dark.
These vintage lights were built to last and they're not that hard to find and quite collectible. Here's a Union Lamp Company William's Globe made around 1897 courtesy of Transport Collectors Auctions. The vents on the top let the heat escape, while the jewel-like glass reflectors provide some side visibility. For fast and easy on/off, the lights' sprung mounts slid over a simple bracket found on the front of most bicycles at the time. The lens is a heavy piece of glass and it's also the door opened to light the wick.

From the same auction site, here's a bedazzling Bridgeport Brass Search Light ornately decorated to be as delightful during daylight as it was brilliant in the moonlight.

And, to demonstrate that the genuine item is as splendid as the bicycle ad for it, here's the illustration for the light shown in the photo above:
Hope you enjoy these treasures from days gone by, and have fun on your nighttime rides!


It's Time: Lighten Up Your Bicycle!

1930's Colba light bicycle ad
Not that kind of lighten up your bicycle... I'm talking about lighten up, as in adding lights to your bike to be seen and stay safe now that the time's about to change and it's going to be dark earlier for a lot of us.

It's important because, unless you ride only on brightly lit city streets, you can be just about invisible to drivers if you're bicycling at night without lights. We're so narrow and small that they have a difficult time seeing us even when it's light out.

At night, if they're passing us from behind and we aren't using lights, they won't see us until the very last second - if we're lucky. And, they'll also pull out in front of us or turn across our path for the same reason. Both highly dangerous.

 If you ever get stuck biking home in the dark without lights remember that you can't be seen and do whatever you have to to stay safe. For example, riding on the sidewalk, if that's your only option and no one's using it. Cheap flashlights purchased at a convenience store and duct taped to your handlebars and seatpost will work in a pinch and be handy at home too.

Fortunately, with advances in bulb and battery technology, bike lights have improved in leaps and bounds since the cool Colba light in the ad here was state of the art. So there's no good reason not to equip your two-wheeler with lights. Any bicycle shop will have bright, easy-to-install headlight and taillight setups to keep you safe. In fact, most department stores carry them, too, though you won't get the guarantees, spare parts availability and installation help if you need it.

Planet Bike's Superflash taillight and Blaze headlight is a nice example I have on one of my bikes. Using bright and super long-lasting LEDs (light emitting diodes), standard batteries and easy mounting clips, these lights go on and off in a blink (so they won't get stolen if you lock your bike downtown) and are bright enough to be seen and see. (I especially like that the taillight comes with mounting clips for the seatpost and seatstay so you can always find a spot to install it.)

But there are loads of light makers and an endless variety of bicycle lighting systems at all price points, so shop around, ask friends you ride with what they use, but light your bike up soon so you can safely ride right through the season.

See you on the road,

Jim

The Skeleton Peloton Wishes All A Happy Halloween!

Fellow pedalers, from deep within my dusty, spiderweb-shrouded bicycle archive of relics, here are some spooky skeleton cyclists dying to wish you a happy and haunted Halloween.

Talk about low body fat, strength-to-weight ratio and the courage to bury yourself - this doomed peloton powers down the road - unaffected by the wind whistling through their bones, floats ghost-like over the steepest climbs and bombs the descents with death-defying speed.

The 1904 Dawis rider on the left, "Skully," is the team fastman. With his razor-sharp elbows and massive rib cage there's no beating him across the finish line.

And, though "Grinning Boy" on his permanent podium, appropriately painted yellow, appears stuck in cement, his workman beginnings in Oaxaca, Mexico sculpted him into a top domestique up to the toughest tests. His springy legs can close any gap, he can drive the pace at the front relentlessly and is also perfectly delighted to tote bottles all stage long.

Then, we come to our merry band of pranksters, The Politicians drawn by satirist Jose Guadelupe Posada in 1890. Sure to strike terror in the heart of any competitor, this ghoulish gang is ready to dominate with trick aero helmets, cutting-edge framesets and wheels and even wings!  Have a great Halloween everyone!

Q&A: More noisy bicycles, checking cassette wear, too clean

Happy Halloween everyone! In this season of ghostly apparitions and things going bump in the night, here are a few Q and A's on chasing away bicycle gremlins. And, remember to save any Snickers bars you get while trick or treatin' - great ride food!

Q: Hi Jim,
Bike noises can be such puzzlers, so I was happy to find your webpage on them. I could relate to many of the noises. Here's one that had me stumped (still does, insofar as the exact mechanism goes).

I have a Gary Fisher HiFi-Plus mountain bike. I ride a lot and stay on top of general cleanup, as Boise's summer trails are dusty. After a couple of years, it developed a slight "click" or "tick" on most crank revolutions. Came from the bottom bracket/crank area. You could hear it but not feel it. I kept riding. With time, the single click grew to a couple of clicks - again, fairly regular with revolutions. With more time, these clicks merged into a close-spaced series that I would call a "c-r-r-r-reak". Almost the sound of something flexing. Usually took 10-15 minutes of riding to really develop. Of course, such stuff resonates through the whole frame and is annoying no end.

As this developed over a month's time, I suspected and tried everything - pedals, cranks, chainrings, chain, bearing bracket, frame cracks, etc. Check, tighten, clean, lube. Nothing helped. Other mechanic friends suggested everything I had already tried. Having admitted defeat, I dropped by the shop I bought the bike from, recounted the history, told them I wasn't going to give them the bike to puzzle over (I was going to fix this myself!), but had they ever run into this on this bike?

Almost without hesitation, the mechanic told me to to just disassemble the bottom bracket, clean it up, and put it back together. I protested, saying that I knew it was in/torqued to specs, etc. He said, "Trust me." I did.

Complete tear-down, wipe-down, lube and reassemble. Voila - no creak. Not for 2 years now. My explanation: somehow fine grit or something works its way into those fine threads, or the metal-to-metal/metal-to-plastic contact of bearing/bracket parts (or something) gets to where parts move against each other ever so slightly, generating the sound in the flexing or twisting.  What do you think?

Eric

Teflon tape can silence BB clicks and ticks
A: I�m glad your mechanic was able to give you such a sure fix, Eric. In a lot of cases I�ve seen, it is the BB � not always � but so frequently, that it never hurts to take out and reinstall the BB. On most cranksets these days it�s relatively simple to do this if you have a few basic tools, like Park Tool's BBT-9 cup tool for Shimano BBs. It used to be a much bigger job to do it right, but then BBs didn�t used to make noise so often either. Maybe it�s a trade off we all have to make to enjoy cartridge bearing, oversize, external cup BBs?

The bike I ride the most is a Litespeed Vortex road bike. It has an aluminum BB in a titanium frame. This combination tends to eventually creak, click, etc. A trick that works is wrapping plumber's Teflon tape around the BB cup threads during installation. This adds a layer of plastic in there and seems to give you several years before any noise returns. In fact, Jeff Pierce, the 3rd American to win a Tour de France stage (on his Litespeed Vortex), told me the mechanics used plumber's tape on the team bikes.

And, I think you�re right, that the parts in the BB are slightly loosening and that dirt/grit is getting in there and causing the noise. You might experiment with plumbers tape or a thicker lube, maybe an anti seize, or a Locktite even, to see if you could get a longer lasting seal that prevents the noise almost permanently.

It�s fun figuring this stuff out � if the noise doesn�t drive you crazy first!
Jim

----------------------------------------------------
Q: Hi Jim,
I saw that you ride a Cervelo Soloist just like me, so I thought you'd be a good person to ask. This seems like it should be a simple question but... I've been asking around about how to tell if a 12-25 cassette should be replaced?

I need to replace my chain. If I don't replace the cassette at the same time, and it's bad, I run the risk of ruining the chain prematurely. If I replace the cassette and it's not bad, I'm just throwing out a good cassette (which happens to be a Shimano Ultegra model).

So, if I can know the signs of a bad cassette, I'm golden. Problem is, every bike shop I talk with tells me there is no way to really tell, and that I'm better off replacing the cassette. That's OK if you have deep pockets. I thought of comparing a new cassette directly with the old one, but is this really the only way?

Any suggestions you offer up will be greatly appreciated,

Bruce

A: What the shops are telling you is pretty accurate, Bruce, but there actually is a cassette-cog checking tool made by the German chain/hub company Rohloff, but I�ve never had a chance to try it � or even seen it anywhere. You can learn more about its use on their pdf instructions page and check out the illustration on the right. Here�s the page on it on their site.

It might be an interesting and helpful tool. I�m not sure having never used it, but I'll try to purchase one and give it a try.

Unfortunately, you can�t know if a cassette is worn out without checking it somehow. The changes to the cogs over time are so slight that you can't see the wear the way you can with the chainrings, which are made of aluminum and change shape more distinctly. But, it�s foolish to pay for a new cassette if your old one isn�t worn out. Also, unless it�s truly worn out, a cassette won�t hurt the new chain.

The standard way to check for cassette cog wear is to install the new chain (when the old one needs replacing), and then go for a test ride. While riding, you shift onto each cog, one at a time. On each cog, you stand up and push hard to feel if the chain runs smoothly and more importantly if it skips. Skipping makes a loud popping noise and you�ll almost crash if you�re not careful as the chain actually rides up and off the cog and skips forward. If you experience this, you know that the cog(s) that skip are worn out and the cassette needs to be replaced.

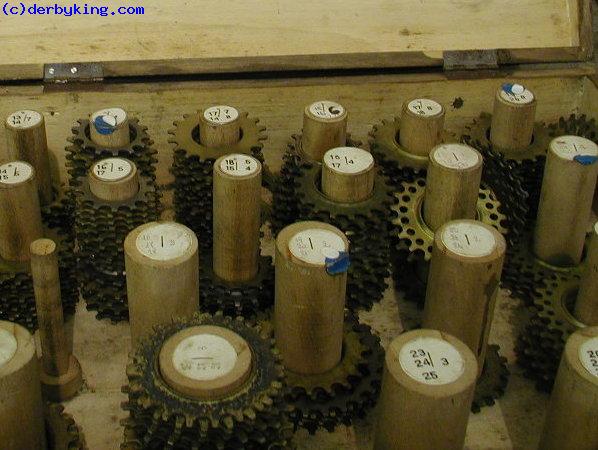
In the days of freewheels we could replace one cog at a time. Typically, you�d replace only the cogs that skipped and they�d usually be the smallest cogs. So, you�d put on a new 12 and 13 and the cassette would be good to go. Here's a photo of a classic Regina freewheel cog case that we used to use to build and repair Regina freewheels in the 70's and 80's.

With the advent of cassettes, though, you now have to buy the whole thing, which is a shame because you never wear out all the cogs at the same rate so you�re paying for everything when you only probably need one new cog.

You can keep a cassette lasting longer by changing the chain more frequently, but you end up paying for the chains, so you have to do the math for yourself and decide what makes the most sense. If you prefer expensive chains, you probably want to get your money's worth out of them.

Most of us just ride the chain until it�s showing signs of wear and then we replace it. Usually the cassette won�t be worn out yet. But, after you�ve replaced 2 chains, you may need a new cassette. It depends a lot of how and where you ride. So, if you�re in the rain and climbing hills all the time, you will wear things out faster than a flatlander in dry conditions.

If you decide to buy the Rohloff tool, I�d enjoy hearing how you like it and if it�s useful. I didn�t study the instructions sheet, but maybe you could even make your own version somehow as a do-it-yourself project? Though it may be easier to just test ride your bike with the new chain to see if the cassette is worn out yet.
Jim

----------------------------------------------------
Q: Hello from Bucharest, Romania, Jim!

I found you by searching on Internet about bicycle noises, read it with great interest. Thank you for posting that info!

I just want to tell you about a strange noise which comes from my bike and drives me nuts. Maybe you met that before and I would be happy if sharing some info.

Shortly, while riding in sitting position with every pedal revolution I hear a noise coming from the upper tube of the frame. Sounds like metal crack. And the weird thing: when I loosened and then tightened the seat binder bolt the noise disappears for a while (let's say like 10-15 km of riding) and then reappears.

I already spray lubed it, installed it back, and it did nothing. The noise also appears if staying only in sitting position and moving back and forth without pedaling, but when I lean forward my upper body it starts to disappears. It seems to me like a sort of tension is creating over time between seat post and frame.

I'll let you know in case I found a solution and maybe you'll find it useful to put it on your website.
I'll be glad to help out other cyclists.

In case you have any suggestion please let me know, I would highly appreciate!

Regards,
Lucian

A: Nice to hear from you, Lucian, but sorry to hear about the noise on your Scott Scale 50 bicycle. Have you tried using a semi-permanent grease on the surface of the seatpost, inside the clamp around the frame and on the bolt too? There�s something called anti-seize. It�s a kind of lubricant designed to not evaporate or wear off. The kind I have is silver. If you get it on your hands, it�s hard to get off because it�s sticks so well.

If you can find this stuff, and apply it to those parts, it might make the noise go away forever. I would also take the time to disassemble the seat clamp at the top of the seatpost � the part that clamps the seat. Then lube those parts and put it back together. That�s an area where these noises come from too, and if the seatpost was not lubed already, they may have forgotten to lube the seatpost clamp/seat interface too.

These steps should quiet your bicycle!
Jim

----------------------------------------------------
Q: Hello Jim,

Shimano Nexus Inter 7 Roller Brake Hub 36H 7 Speed SilverHere I am again with a problem facing to. I took apart my Shimano Nexus internal-gear hub, because it started to have some sandy noise from it (suspected that some dirt penetrated under the sealing). Took off the whole gear set from the hub as one, washed in petrol, put some grease on it and installed back.

Even though it seems everything in the right place, in gears 3-7 and when using the pedal brake, it has an awful cracking noise. Any hints what did I do wrong? I used white vaseline from the pharmacy as grease, can it be the mistake?

Thanks,
B�la

A: Hi B�la,
I suspect that when you washed it with petrol you removed all the lubrication. Petrol is too harsh for cleaning bicycle parts like hub gears. It's so powerful it cuts through and ruins any lubricants inside and you end up with a part that's dry and no longer lubricated. This puts metal parts that touch each other and need to mesh correctly in jeopardy because they are now running metal on metal with no film of lube between them.

Lubing it with Vaseline wouldn't likely solve the problem. The petrol gets inside the parts and washes out all the lube. The Vaseline - even if you spread it and push it - will have a hard time getting between parts and lubricating them adequately.

What I would try is taking it apart again and lubricating it with a thick oil, like automobile motor oil. You need to get this inside the parts. Be sure not to get it on any parts in the brake that are required to provide friction for stopping. But, get it inside the moving parts that mesh for shifting/gearing. One approach would be to soak the parts in an oil bath for a while so the oil really penetrates. Then, you'd want to let it drain out and wipe the outside of the part clean. Oil will leak out in use later, but you can use a rag to wipe it off. And, you know the part is lubed inside.

In the future for cleaning you can use a thin oil. This will wash out dirt while keeping the lube intact inside the parts. You never want to remove all the lube because it's hard to get it back in there. That's why it's a problem to clean parts with petrol or engine-cleaner solvents.

You should us a good bicycle grease on any hub bearings. Vaseline is too thin to last long enough.

I hope this helps get the hub running nicely again,
Jim

Q&A: Making a Bolt-On Front Wheel Into a Quick-Release

With so many people converting classic old 10-speeds into city bikes, and it being an excellent fall bicycle project, I thought this question was a great one for an extra-long answer.


Q: Hi Jim,
I saw your website and like it. I was trying to learn how to install a quick-release skewer on the front wheel of my bicycle so I can take the wheel on and off without needing tools. I bought just the quick-release skewer at the bike shop because I thought that�s what I needed.

When I got home, I unscrewed the nuts on my wheel and removed it from the bike frame, but I couldn�t figure out how to attach the quick release. I thought it took the place of the big bolt running through the wheel that the nuts were screwed onto. But, I can�t see any way to attach the skewer to it. And, I can�t get the bolt out of the wheel. Can you please explain what I need to do?

Thanks!
Carol

Click to enlarge!
A: That�s an excellent question, Carol. It's a bit complicated to explain, but I'm sure it'll help a lot of cyclists, for example someone upgrading an old ten-speed to a fixie.  Because, changing a bolt-on front wheel into a quick-release wheel lets you remove the wheel without tools and that makes flat-tire repairs easier, lets you remove the wheel so you can place it next to the rear wheel for locking your bicycle with a U-lock, and it makes it easier to remove the wheel for putting it in a car for travel too. Removing the front wheel is required for putting a bike in some car racks too.

Definitions
To explain how to switch to a quick-release axle, let�s start with some bicycle part definitions. You have a bolt-on wheel. A wheel that is held onto your bicycle with nuts. That threaded part that the nuts you removed were screwed onto is called the axle. The part of the wheel the axle passes through is called the hub. Your axle type is called a bolt-on or solid axle because it�s basically a threaded steel rod.

What you want to do is turn your wheel into a quick-release wheel. In order to do this, you need to remove that solid, bolt-on axle and the parts on it, and replace them with a quick-release compatible axle and parts (called a quick-release axle set).

This new quick-release axle set will have a hollow axle (it will have a hole right down the middle). It will also have a shorter axle that does not protrude past the frame on either side. The quick-release axle set gets installed in the wheel. When that�s done, the quick-release skewer gets installed into the hollow QR axle and then your wheel will be a quick-release wheel. Here�s an animated explanation of how to operate a quick release skewer in case they�re new to you.

What's Needed
In order to change the axles in your front wheel, you need to get the right quick-release axle set for the hub on your wheel. Since hubs vary a lot, the best way to do this is to visit a bicycle shop with your wheel and tell them what you want to do. They can look at your wheel and the axle set it has and check their selection of quick-release compatible axle sets to find the one that will fit your wheel. You should probably call first to make sure they have axle sets in stock and don�t need to order one for you.

To switch the axle sets, you need cone wrenches to remove the parts on your current axle so that you can take it out of the hub. Then you can install the new quick release-compatible axle set. Cone wrenches aren�t expensive, but it may be cheaper/easier to have the shop change the axle versus the cost of the tools, parts and labor. Once the QR axle set is in there, your wheel will be a QR wheel.

The photo shows the differences between the axles sets. Note that the quick release includes the lever (on the left), the skewer (the rod that passes through the hollow axle), 2 springs (that keep the quick release ends away from the axle so they�re not in the way when you put your wheel on), and the quick-release cap, the part on the far right that closes on the right side of the fork to lock the wheel on when you close the quick-release lever.

You can also see an example of cone wrenches. Shown are my vintage Campagnolo cone wrenches, among my favorite tools. The ones you get will look different but have the same thin jaws. They�re thin enough to fit in between the outside nut on the axle and the cone. You hold the cone with the cone wrench that fits, and turn the outside nut counterclockwise to loosen it. Then you can take both off the axle and pull the axle out of the hub.

The cone wrench has to fit the cone and they come in different sizes, so if you want to buy the wrench, you need to either buy several sizes and hope you get the right one, or measure the flats on your cone on your axle and order the wrench that�s the right size. You'll probably need a 13, 14 or 15mm cone wrench. Some shops sell cone wrenches too and they could tell you which one to buy if you brought your wheel in for them to look at.

Check The Hub Bearings Too
When you remove the bolt-on axle, look inside the hub at the bearings. There should be nice, shiny steel ball bearings inside with a film of grease on them that�s clear or white. If instead you see black grime or red rust, you�ll want to purchase new bearings and replace your old ones with them. Be sure to clean the inside of the hub thoroughly and put new, clean bicycle grease in before installing the new ball bearings and axle set.

Adjusting The Hub Bearings
Use your cone wrench(es) to fine-tune the bearing adjustment. The new axle set should feel super smooth when you turn it with your fingers, and there should only be the tiniest trace of play when you pull up and down on the axle. Also, be sure to lock the adjustment by tightening the locknut against the cone. Check both sides, too. When you adjustment is right, the slight play in the axle will go away when you clamp the wheel in your bicycle.

Troubleshooting Tips
Here are few issues you may run into when switching axles, and workarounds for dealing with them.

Issue
The new cones are larger in diameter than the old ones and they don�t fit through the dustcaps on the hubs.

Solution
If you have a grinder or a drill press, it�s easy to machine the cones to a smaller diameter to fit through the dust caps. To do it on the grinder, leave the cone loose on the axle. Then hold the axle and rest a finger on the cone as you touch the cone to the grinder. This lets the cone move along the axle while you apply just enough pressure to remove enough material off the cone, letting the cone turn beneath your finger, which acts as a brake to control how long each part of the cones gets ground by the grinder.

On the drill press, you can put the axle in the drill-press chuck and turn on the drill press and simply hold sandpaper or a file against the cone to machine it to a smaller diameter.

Issue
The quick-release axle set went into the wheel fine, but now the wheel doesn�t fit into the bicycle because the fork is too narrow.

Solution
You need to spread the fork blades to be wide enough apart to accept the new, wider axle spacing. This is a little scary, but the forks that you�ll experience this with are usually made of relatively soft steel. If you stand in front of the bicycle and grip one fork leg in each hand and pull outward evenly and simultaneously with both hands, there�s an excellent chance you�ll be able to add the 2 or 3mm you need on each side for the new axle to fit. If you get it right, the wheel will slip right in and be centered when you tighten the quick release. If you get it wrong, you�ll need to move one side of the fork a little until the wheel fits and is centered.

Issue
The quick-release axle set went into the wheel fine, and the wheel fits in the bicycle fine, but when you close the quick release it doesn�t clamp down on the frame - the wheel remains loose - it won�t tighten.

Solution
This issue is caused by basic stamped-steel dropouts (the parts at the end of the fork that the quick release clamps against), that are thinner than the higher-quality dropouts quick releases were designed around. The problem is that the quick-release axle is too long for these narrow dropouts. So, when you try to close it and tighten the wheel, the QR bumps into the end of the axle instead of clamping on the fork dropouts. The fix is filing material off the ends of the axle until they no longer interfere with the quick release.

There you go! Now, enjoy the convenience and fun of having a quick-release front wheel!
Jim

Q&A: Broken-Spoke Fix, MTB to Road Rings, Cleats & Slipping Gears

Happy Tour de France season everyone. Hope your cycling summer is in full spin. Here are some recent technical questions and answers I think you'll like.

Q: Hi Jim,
I have a pair of Rolf Prima Elan Aero wheels and am about to change a dinged spoke. I am a competent mechanic and have successfully built standard wheels before but have never delved into the ultralight, high-tension, paired-spoke designs. I am looking for any guidance you might offer, but my specific concern is the effect of removing the single spoke without detensioning the whole wheel (something I don't really want to do). The spoke in question is just slightly dinged (and I don't trust it to ride on) but the wheel is completely true. Do you see a problem with just swapping out the spoke?

Thanks for any help... keep up the great work,
Tracey

A: Great question, Tracey,Hold the rim in place with a toe strap
On the spoke - if it just has a tiny nick, it�ll probably hang in there indefinitely. I�m riding on 8 spokes like that right now and just haven�t got around to fixing them. A stick jammed in my rear derailleur and that brought it into the wheel, munching the spokes.

Mine are DT Swiss spokes, which are very strong so I�m betting they won�t break even though they�re all gouged pretty good � but I do have 32 spokes in this wheel, which is a lot and that helps.

So, to be 100% safe, you would replace your spoke. As long as you don�t cut the bad spoke out you shouldn�t do any damage to the wheel removing it. Just unscrew the nipple slowly and surely and remove the bad spoke. Then, install the new one. Be sure to lubricate inside the nipple and the outside of the nipple so it turns nicely on the spoke threads and on the rim, too. Also, press the hub end of the spoke down so it seats on the hub in case there�s any extra bend.

Next just gradually bring that spoke back to tension. Do this by ear. Pluck the spokes on the same side and listen to their pitch. Then tighten that new spoke until it makes the same pitch when plucked. In most cases, when the pitch is the same, the wheel will be nice and true as before. You probably won�t have to do any final truing - or just a tiny bit.

If you are really worried about stressing the rim removing one spoke, you could do this (photo): put the wheel back in the frame and turn it so that the bad spoke is right next to the seatstay. Then, wrap a toe strap (or tie) around the rim and stay on the same side as the bad spoke, and snug the toe strap. The toe strap will keep the rim from moving when you remove the spoke.

This will prevent any possibility of damage to the wheel at all and make it even easier to install and retension the new spoke,

Truely yours,
Jim
-------------------------------------------------------

Q: Hey Jim, I have a Trek mountain bike. I have slick road tires on it because I do road riding; no trails. I can get up to 20 mph at around 90 revs per minute. I would like to go from the 3 stock chainrings to two road-bike chainrings. What 3 chainrings - not brand, but how many teeth on the small one and how many teeth on the large one should I use? I live in Jacksonvile, Florida: Flatsville.

Thanks for your help!
Lee

A: This is a little tricky to answer because I�m not sure what model front derailleur you have on your bicycle or what chainring sizes you have now or what chain length you have, either. You might be able to just change the 2 larger chainrings on your bike to larger ones and simply raise your front derailleur higher on the frame to get it to clear the new, larger rings. But, usually if you go to significantly larger chainrings, you will need to add links to the chain too.

For example, a common mountain-bike triple-chainring combination is 22/32/44. Standards for the road are 39/53 and 34/50 (called "compact" chainrings). First you need to see if you can find road chainrings that will fit your MTB crankset (bolt patterns differ). And, then you need to make sure that you can raise your front derailleur enough to not bump into the largest chainring. Sometimes they can be raised easily and sometimes they can't.

Another option would be to change to a true road double crankset. For this, you would probably need to install a new road bottom bracket to go with it. That�s the bearing assembly in the frame that the crankset attaches to. That�s usually required because the double crankset sits closer to the frame than the triple.

You�ll also need a new front derailleur that works with the road double crankset since you have a derailleur made for triple cranksets now. And, you might need a new left/front shift lever to get the shifting to work right.

So, the easiest thing to get higher gearing will probably be to figure out what the largest chainrings you can put on your bike are that won�t require a new front derailleur. You will still have 3 chainrings, but 2 will be bigger and give you the higher/faster gearing you want. A good bike shop should be able to look at your bike and help you find the right rings so that this upgrade doesn�t cost you too much.

Another way of looking at this is that if you mainly ride on the road and don�t plan to ride off road, instead of making any more changes (spending any more money) to your mountain bike, you could reinstall the stock knobby tires and sell it as a nice, used mountain bike. Then you could take that money and purchase a nice road bike that was ready to go for real road riding.

That makes sense because no matter how many changes you make to your mountain bike, it will always be designed mainly for off-road use. Lots of people turn mountain bikes into pseudo road bikes, but, while they work fine, they won�t match the performance of a true road bike. So,if you really want to ride the road a road bike makes the most sense in most cases.

Have fun dialing in your bike,
Jim
--------------------------------------------

Q: Hi Jim,
I am looking at replacing my worn out Diadora road cycling shoe with a pair of new Sidi�s. I have had the Diadoras for a while, having had them professionally fitted in a bike store using a bike-fit platform, where they marked the ball of my foot and corrected the orientation of the cleat to the shoe.

I was wondering if there was a way I can achieve the same result myself without having to consult the bike store again?

As a racing cyclist I have used the fit and adjust method over the years. That is, I have fitted the cleats where I think they should sit on the shoe, fixed them tight then ridden for a while, making slight adjustments each time. Obviously this method is far more time consuming than having them professionally fitted.

Appreciate your feedback.
Tony

A: Nice to hear from you, Tony, and sure, you can fit your cleats yourself to your new Sidi shoes. All the new space-age fitting methods are pretty cool and very helpful for people who need them, but people have been fitting cleats to bike shoes for a hundred years without them and doing just fine, so they�re not essential.

There are only 2 steps: 1) get them in the right position so the ball of your foot is over the pedal axle; and 2) make sure they are at the right angle so that the pedaling feels neutral (no pain or discomfort in your knee).

I have a cycling shoe cleat adjustment page on my website with more detailed step-by-step instructions you can follow here

Hope this helps and let me know if you have any questions!
Jim
----------------------------------------------------

Q: Hello, Jim. I really enjoy your website and have referred it to others like myself who are just getting into riding. I like to ride but can't get used to all the shifting so I always stand when climbing a steep grade. And all the slipping, etc. makes me uncomfortable. I'm 57 and too old to change my ways. There are bikes I've seen sold with rear hub gears. But with only 7 or 8 speeds that these drivetrains have, will I be able to adapt to the selected ratios given, compared to a 21- or 27-speed road bike? How much difference in the gearing is there?

Thanks!
Tracey

A: I�m not sure how to answer your question, Tracey, because you said you can�t get used to shifting your bike, but then you said it�s always slipping. A bicycle�s gears shouldn�t slip. That suggests that they�re not adjusted correctly. And, any gears, if they�re not adjusted correctly (even bikes with hub gears) will give you problems.

So, the correct solution is probably not to spend a bunch of money buying a new bike to get a different gearing system that can also slip, but to have your bicycle checked out to adjust it and stop it from slipping.

So, that�s one option. But, when you said �slipping� you might have meant that you just don�t like the way derailleur gears work. They work by moving the chain across the different gears. This can feel funny if you�re not used to it, or if you don�t know how to shift correctly. The key thing to remember is that you need to keep the pedals moving in order to shift, but you NEVER put any pressure on the pedals during the shifting. You aren�t pedaling to move the bike down the road. You�re just pedaling super easily to move the chain so it can climb onto the next gear. You wait for the chain to find the gear and seat on it, and then you can apply pressure to the pedals again.

If you try to shift when you�re halfway up a hill and you have pressure on the pedals to climb the hill, the chain could slip or make noise. The key is to shift BEFORE that steep part so that you can take the pressure off during the shift, let the chain find the next gear and then you can apply pressure again.

The more modern the drivetrain the smoother the shifting. But, it has to be adjusted right too. Bikes sold by bicycle shops will be adjusted right. Bikes sold by department stores will not be adjusted right (they don�t employ bicycle mechanics).

If you don�t like the feel of a derailleur drivetrain, with the chain moving all the time, or don�t like having to shift right and left levers, a hub gearing system can be a nice alternative. These have been around forever and they work great. But you�re right that they generally provide fewer gears. Typically you have one lever on the right side and 3 to 8 gears available from the rear hub. You simply click the lever and with each click one way it gets easier to pedal, and harder with each click when you move the lever the other way.

Hub gearing typically comes on bicycles that weigh more than the same bike with derailleur gears and more weight means more effort to pedal the bike. So, it really depends on where and how you ride your bike in determining whether hub gears make sense or not.

They�re pretty ideal for shorter, flatter rides and utility cycling where you ride into town and back or around town. They�re not so good on hilly terrain or long rolling rides where you need to shift a lot and use a wider range of gearing. Note that hub gearing comes close to having the same low and high gear as a derailleur drivetrain but there are less choices in between that high and low since you only have 8 gears, or so.

If you told me how you plan to use this bike, I would be able to better answer if hub gears make sense for you. But, the other thing you could do is visit a bike shop with these bikes and take a test ride to see how you like it on one of your rides. I think you�ll really enjoy the shifting since it�s much simpler than derailleur shifting. I just don�t know if it will provide the gearing you need for the typical riding that you do.

My hub-gear bikes are my city bikes. I wouldn�t take them on a 30-mile hilly ride, but they�re great for getting around town, to the beach and all over the neighborhood.

To smooth shifting,
Jim
-----------------------------------------------------

Q: Hello Jim,
I've started commuting again on my bike after a layoff of a few years. So I'm doing my tune-up today in the sunshine. Your website is very helpful, I'm really learning a lot.

I have one problem. I cannot adjust my rear brake cable at all. I think this is because when I got the bike a decade ago, I had the drop handlebar fitted from my previous bike, with the safety levers (which I do like). But the rear brake caliper wasn't changed, so I have no adjuster on the lever and no adjuster on the caliper.

So how can I tighten the rear cable? Any suggestions? Strangely, there is an adjuster on the front cable, above the caliper, with a lever to loosen it.

Hope you can help,
Jon

A: Hi Jon,
Congrats on commuting by bicycle again. Good for you! Here are some tips on your brake:

If a brake has no adjuster, the way to adjust it is with the cable. So, what you do is keep trying different cable adjustments until you get the brake operating the way you like it. You do this by loosening the cable anchor bolt on the brake and pulling the cable through to remove slack, or letting a little cable slide through to create slack so you have more room between the brake pads and rim.

One adjustment trick that may help you is to make shims or spacers � 2 pieces of cardboard work nicely. Take these shims and put them beneath both brake pads. Now, hold the brake closed, pull on the cable to remove all slack and tighten the cable anchor bolt. Next remove your cardboard shims. That should give you a nicely adjusted brake where the pads clear the rim and still offer nice, powerful stopping power too.

Hope this gets those stoppers working great!
Jim Langley

Q&A: Bike Repair Schools, Bike Storage, Fixie Gearing, Scratched Carbon and more

Q: Hi, Jim. I'm in Kailua, Hawaii. I am a bike enthusiast and have been competing in time trials. I have always wanted to attend a bike mechanic course and understand some of the main schools are in Oregon and Colorado. I will be visiting my daughter in Santa Monica soon. For efficiency, I wanted to attend a course/school in the area, or maybe work in a great bike shop (as free adult supervised labor) to learn much more about bicycles. I would appreciate any suggestions.
Thank you,
George

A: Nice to hear from you, George. LA's a huge place so I think there's a good chance you can find some type of bike repair school there. What I would do is have your daughter call around to the shops in her general area and ask them if they're holding any bike repair clinics this summer. I bet if she calls 3 or 4 shops she'll either find out about a class a shop is offering or about one held at a local college.

Rec departments often hold them in the summers in big cities, too - and they're usually taught by local bicycle mechanics. I think since LA is so large that there's a good chance you'll find something like this. It will just take a little searching on the part of your daughter but I think just using the Yellow Pages and calling shops down there should do the trick.

Working in a bike shop - even for free - is something you can ask about, but I suspect most shops won't be interested due to laws that put them in jeopardy should they employ you and not pay you. If you'd like to learn more about the main bike repair schools, visit United Bicycle Institute and Barnett Bicycle Institute.

Q: Hi Jim,
I recently re-married to a wonderful non-cyclist mother of two. Of course, I immediately turned them all on to cycling! It worked so now the trouble is bike storage. I don't have a garage and my basement was remodeled into a family space so I lost my bike room and work area.

I need to build a place to store our bikes plus a workshop space. We currently have 11 bikes plus my 10 month old son's trailer. (I'm sure he'll have several bikes soon enough which will add to the quiver.) These developments have interested me in your Home Bicycle Workshop book. I'm sure it will address lots of areas but my main concern is bike storage. Does your book address things like ceiling height recommendations, wall vs. ceiling vs. floor vs. stands, etc?
Thanks in advance,
Steve

A: Yes, Steve, my book (photo) talks about storage solutions. You can read more about it and order your very own copy here, but I'm sure I don't address every possible situation. From what you wrote, it might make sens to line all your bikes up on one wall, hanging each by a single hook. You'd alternate bars up, bars down, and they

wouldn't take up much space except to poke out into the room as far as they are tall. You might want to add a wall "bumper" 2 x 4 for the tires (on the wheel that hangs lower) to bump onto so they don't mark the wall. Since studs don't run closely enough, you can use a long 2 x 4 to screw the bike hooks into as close as they can be placed to space your bikes right (just stand your bikes up side by side and measure to see what will work best). Then you can screw the 2 x 4 to the wall with lag bolts into the studs on the wall.

You need a fair amount of ceiling height to put them overhead, but if you have it, you could hang each bike by the wheels with 2 hooks and that's pretty easy if you have rafters overhead or joists to screw to. Don't put them any higher than you can reach, though, or you won't be able to get them down easy/fast,
Jim

Q: I have a 1994 Klein Attitude with a pressed in bottom bracket. My problem is that the spindle snapped. Can you help me find a replacement bottom bracket?
Thanks,
Stephanie

A: Thanks for the email, Steph. You probably don't need a whole new bottom bracket but just the bottom bracket spindle. You can get it from Phil Wood. You may have to have a shop order it for you as I'm not sure Phil sells direct to consumers. You may want the shop to install it too, so they can make sure it's right and regrease your bearings too.

Q: I managed to crash my road bike this weekend and amazingly did little damage appart from frustratingly scratching my deep section carbon tubular rims. The scratches are deep enough to be felt when braking on the wheels, as they are on the braking surface, but not so deep (I hope) to be serious in structural terms. I was planning to fill them (epoxy?) and then sand/polish them back down so they are flush with the braking surface. Can you give me any advice about how to approach this and what to use. It would be much appreciated.
Cheers,
Ned

A: You could try basic 5-minute epoxy, Ned, but it's messy to work with and thick enough that if it's only small scratches it might leave too thick a layer to easily stand down. A bigger issue is that epoxy usually softens with heat and braking causes heat. So it may not work very well to patch the braking surface. It's important to make sure the scratches aren't structural. You could tap on the rim with a quarter to see if it sounds different than a non-scratched part of the rim. If not, the rim's probably okay. I bet the scratches won't effect the braking much, and they'll smooth out as you brake, so you might just keep riding the rims and see if the braking issue goes away.
Good luck,
Jim

Q: I just purchased a Cannondale Capo singlespeed bicycle. I have been riding a Cannondale R500 road bike for years now, and really never ever switched out of the highest gear, so I figured I would simplify things. Upon purchasing the Capo I feel like a hamster spinning in an exercise wheel. The chainring and cog have way too low of a ratio for me to feel like I am doing anything. The crankset and cog give me a 42/17 gear.

The cranks only attach to the chainring in four places instead of five. Basically I want as large a chainring as possible, and as small a cog as possible, but I do not want to get rid of the cranks as I like the way they look and feel. What options do I have? I want my new bike to feel as comparable as possible to riding in high gear on my previous bike. Thanks for any help you can give me.
Sebastian

A: Hi Sebastian,
Since you just purchased your Cannondale, the best thing to do is to return to the bike shop where you bought it and tell them you want harder gearing. Because it's a new bike, they should be happy to switch out the gearing for you, and if you're lucky, at no cost to you. Also, since they carry that bike, they should have the chainring and cog to fit, or can order them.

You probably don't want to go to as high a gear as what's on the high end of a road bike. That would be a 53/12 usually, and that's a super hard gear. It would be hard to get going from stoplights and difficult to pedal up any real hill. So, what you might do is just change the rear cog to a 13 and try it. That'll give you a much harder gear and I bet you'll find you like it. That way you won't need to change the chainring.

If you have to pay for the parts, the rear cog will be inexpensive, but the chainring could cost a fair amount, so it's always better just to go with the cog if you can. You might want to have a selection of cogs so you can vary the gearing from time to time.

Keep in mind that putting on a smaller cog may mean shortening the chain, too. But, I would think since it's a new bike that the shop would be happy to do this for you for a small fee or for free.

Hope this helps and have fun on that great new bike!
Jim

Q: Hi Jim,
I have a TT bike with 650 x 21 tires/wheels. Will a standard inner tube, size 700C, fit these wheels?
Thanks
Jim

A: Hi Jim,
You should use a 650c tube in those wheels/tires. If you were to get a flat tire while out on a ride or during a race, and not have the right size tube - or maybe you needed to borrow a 700c tube from someone riding with you - you can stuff it into the tire and use it to ride home on. But, the 700c tube is larger diameter and you'll need to fold it over a little to get it to fit in the tire. So, it's possible to use them, but it's not ideal. The tube adds weight, isn't as easy to install and doesn't install correctly with the fold in it. For every-ride use, I would stick with 650c tubes, which is the right size for that tire/wheel.

Hope this helps,
Jim

Q: Hi Jim,
I am a female cyclist, road bike, kinda new, a year or two. My computer is not displaying the cadence. I do not know were the sensor is or how to fix it. Can you help?
Thanks!
Debi

A: Hi Debi,
Bike computers usually pick up the cadence reading from a sensor that's attached to the crankarm (where the pedals are). There should be one on that and probably one on the frame too right near the crankarm. If you slightly adjust their positions you should get the cadence to show up again. Keep in mind that some computers have to be put into cadence mode before you see the cadence. In other words, you might have to press buttons on the computer before you see the cadence shown on the display.

Hope this helps you out,
Jim

Q&A: Carbon touch-up, triple upgrade, how much chain lube

Q: Hi Jim, You can use the techniques described to remove bar logos too
I have a Bontrager X-Lite carbon handlebar that I want to sell, and I don�t know what I can use to polish it up. The bar�s scratched where the grips were, and I need to make it look shiny and pretty as much as I can! How would I go about that?

Thanks!
Staci

A: Good question, Staci. Since the handlebar is actually scratched, you're probably going to need to refresh the clear coat that was originally on there in the area that was scratched. (I'm not positive your bars had a clear coat, but most do.) An easy shortcut that might work is to just get some clear fingernail polish and take the brush and try painting the scratches just like you were doing your nails (if you do), and see if the scratches disappear. That sometimes works. It depends on the scratches but maybe you'll get lucky. If so you'll be done with your "repair" in a few minutes, plus drying time. This works as a way to touch up a paint chip on carbon frames or parts too. Just get the right color of fingernail polish for a paint finish (fingernail polish comes in an amazing assortment of colors and is often easier to find than regular touch-up paint... FYI, I even know someone who painted an entire frame with fingernail polish).

If this doesn't do the trick, it might be that the bars are scratched more. In general you want to be very careful with any carbon part that has scratches on it because carbon as a material is highly notch sensitive. This means that if you scratch it deep enough you create a weak point in the piece (a notch) that will usually result in the part breaking right at the scratch/notch.

The tricky part is figuring out what's a minor scratch and what's a real notch you need to be concerned about. You can usually do this with a good magnifying glass. A notch to be worried about looks like a break, or if you have a strong magnifying glass, it looks like a small Grand Canyon in your part where you can see down into the granular structure of your part (your handlebar). A scratch won't look like this. It will be a shallow indentation. Here are lots more tips on caring for carbon bicyles and components.

In most cases what you are describing from the grips on your bar will be scratches in the clear coat on your handlebars, not a real notch. But, I just wanted to make this real clear since you wouldn't want to sell anyone a handlebar and then have it break when they are riding. An example of a notch issue is when you overtighten levers on the bars, or if the levers are slightly loose and they move around on the bars and actually cut into the carbon fibers of the bar. That wouldn't be good.

For simple surface scratches in the clear coat the fix is relatively easy:
1. Get some fine wet-sanding emery cloth at a place like The Home Depot. 600 or 400 grit will work fine. You only need a few pieces.
2. Put the emery cloth in a pan of water to wet it.
3. Gently sand the bars until the scratches are removed. As you sand you will roughen the clear coat on there and you won't be able to see the scratch you're working to remove. To check how it's coming along, wipe the bar with a damp rag. This will show how you are doing removing the scratches. Stop sanding when the bar is nice and smooth and the scratches are gone. Keep in mind that I am assuming these are only surface scratches. It will take too much sanding to remove deep scratches and probably not worth the trouble since they will be covered with grips/levers anyway. I would just cover deeper scratches with the clear nail polish I mentions, but again, be sure they are only scratches, not structural damage.
4. Once the bars are nice and scratch-free, clean the sanded areas completely with something like rubbing alcohol that leaves them clean and residue free.
5. To finish the job, you next spray the bars with a clear coat of enamel. You can get this at Home Depot when you pick up the 400/600 wet/dry emery cloth. Get clear coat enamel. It can be a little hard to find. You don't want what's used on wood. You want an auto body clear coat enamel paint. It's best sprayed when it's warm out, about 70 degrees. One light coat will usually do it. It dries quick.

If you do all this right the bars will look brand new when you're done. One more thing: you want wet sandpaper and to sand when wet because you need to prevent any carbon dust from being created. You don't want to breathe carbon dust. Sanding with wet paper will prevent any issues.

Hope this helps! The photo with this show carbon dropped handlebars as an example, because I use the procedure outlined above to remove even large logos on bars like these and it works perfectly (sometimes the logos don't look right with a certain frame color or if you use a stem that's not that same brand).

Jim
PS: A reader named Bill offered these great suggestions, "A better way for the carbon scratches is to go to a motorcycle shop. Buy a tube of Scratch X. It is designed for helmet faceshields and windshields. It will polish out a surface scratch quickly and leave it as new. Also in auto paint stores, 3M makes a clear-coat polish that does the same thing." Thanks Mike!
---------------------------------------------------

Q: Hey Jim,
I have a blast reading and learning from your site. Thanks so much for all the great info! My wife has a Raleigh Venture 7-speed comfort bike. She wants more gears, but doesn't want to buy a new bike. I think she should, but she loves her red color that is no longer offered by Raleigh on the 2009's. I have been wondering if I can modify the bike to make it a 21 speed?. Is it as easy as adding a 3-speed shifter on the left handle, a front derailleur, triple crankset, and new chain? Or is there much more involved?

I'd like to do the job myself, but don't know what it will require beyond these components. I can run the shifter cable and install the shifter myself, but don't know how hard or easy it would be for the front derailleur or crankset. Thanks for any advice you have.

Cheers,
Michael

A: Thanks for the kind words, Michael. I appreciate it. Adding gears is usually possible, but it depends on a few things. I checked out the Venture online and from what I can tell, I believe you could install a triple crank, front derailleur and shifter and be good to go. You might or might not need a new chain. It will depend on how large a chainring is on the bike now compared to the size of the large one on the triple.

It's not a difficult job to make this upgrade but you need to figure out what to buy to make sure it all works properly. There are some dimensions to get right. So, the easiest thing might be to have your local friendly bike shop figure this out and buy the parts from them to ensure you get stuff that will work right. One issue you need to check is the cable path. I know you mentioned that you can do this, but you need a way to run the cable/housing from the new shifter to the front derailleur.

I can't tell from the photo online if the Venture is setup for that or if you'll have to come up with your own solution (clamps, zip ties, etc.) Sometimes the manufacturers include this, sometimes not. It's details like this that the shop could tell you about just by looking, and then get you what you need. Front derailleur clamp size and cable pull are other details, plus you'll want the correct bottom bracket for your frame and the triple crank you choose.

Something to think about is what you really gain by upgrading to a triple crankset. Right now the bike probably has 7 gears, some pretty easy ones, some pretty hard ones. Typically if you go to a triple you will end up with several easier and harder gears. If you knew that all your wife wanted was to make the bike easier to pedal, you could probably provide that by simply installing a larger cassette on the rear wheel. That would be a lot cheaper and easier than converting to a triple chainring setup and it would give her the gears she needed if all she really wants is easier pedaling gears.

Hope this helps and have fun dialing in the bike,
Jim
---------------------------------------------------------------

Q: Jim:
I wonder if you can help me. I have an old Mavic sew-up rim (probably 25 to 30 years old) that I would like to change over to a clincher. I don't know whether to buy a 700c rim or a 27 inch rim. It has 36 spokes if that makes any difference. Any thoughts?

Thanks,
Bruce

A: Hi Bruce,
Sure! You should get a 700c rim. That is the same size as your sew-up rim. A 27-inch rim is actually larger diameter so your brake pads won't line up the same - they might not even brake anymore. As long as you go with a 700c, the "new" wheel will fit almost exactly the same as the old one. Also, it will be the same size as the other wheel on your bike - even more important probably ;-)

Hope this helps!
Jim
---------------------------------------------------

Q: Hello,
I have a question about my bicycle chain. I use my bike to ride to the train station and then I have to leave it there all day until I get back from work. This make it hard to keep clean. I initially had a big problem with black greasy buildup on my chain. I was told that my problem could be fixed by using silicon based lubricant, and only use one or two drops. I cleaned my chain and switched to this lubricant, and the greasy buildup problem went away. Unfortunately, now my chain is prone to rust.

I was told that the way to keep rust off the chain was to keep it �well lubricated.� I think this would then put me back in the first situation again with the greasy buildup. Is there some way out of this catch 22?

Puzzled,
Larry

A: It sounds to me like you were using too much lube and then you switched to too little lube, Larry, hence the rust problem. You want to keep your chain fully lubed but not too lubed. The key is to clean it once so there's no grimy buildup and then lube each link (every link, all around the chain) with one drop each, of good quality bicycle chain lube suited to the conditions you ride in. Your local bike shop should be able to recommend a lube that's perfect for you or ask riding friends in your area what they use and check out their chains to see how they look too.

To apply, drip the lube on the links on the lower run of chain (beneath the chainstay) and do it while pedaling slowly backwards so the rear wheel is not spinning, or else the rear wheel will throw any lube that mistakenly gets on it across the room. After you lube the chain let it sit overnight so it soaks in and dries. Then wipe off the excess in the morning before riding.

Most people who ride every day for commuting or fun can ride for about 2 weeks before having to repeat the lubing process. But, you never want the chain squeaking or rusting. Those are signs of not enough lube and you'll want to relube. Greasy buildups are signs of overlubing so clean again and lube less. There's a learning curve to figuring this out and you have to find a lube that works. I use ProGold ProLink Chain lube, which is expensive but works nicely in our rather dry conditions here in Santa Cruz, California. I use it on my road bike that sees heavy use. And, I relube about every 2 weeks. I also take care to wipe the chain down before and after lubing to get any buildup off. That works well. You have to keep after it, lubing, cleaning, lubing some more, and so on, but it's pretty routine after awhile and your chain won't squeak or rust.

To a clean, smooth, quiet drivetrain,
Jim
---------------------------------------------------

Q&A: Seatpost binder bolt torque, creaky seat, bent derailleur hanger

Q: I just overtightened a seatpost clamp and stripped the threads. I got a new one now. How much torque can I put on this clamp? I have a Thomson aluminum seatpost.

Thanks,
Steve

A: Hi Steve,
Unfortunately it's not easy to give you a torque and be sure that it's right for your frame, clamp and bolt. I wouldn't tighten it with a torque wrench unless I had the information from the company that made those parts. Instead, what I'd do is make sure the bolt is lubed with grease, and then tighten it carefully. It only needs to be tight enough to hold the seatpost from slipping. You tighten the bolt and then you test your seatpost tightness by grabbing the seat and trying to turn it to see if the post is tight yet. Overtightening is very common so go a little at a time until the seatpost is held fast. That's the best way to go about it. If you have a torque wrench you could then check to find out what torque you tightened it to and then use your torque wrench in the future since you have a number for your exact setup.

If you would like to investigate torque settings further, there is a good page on Park Tool's site here: http://www.parktool.com/repair/readhowto.asp?id=88 In it they recommend 36
to 60 inch pounds of torque for seatpost binder bolts, but caution to use care. Also the seatpost bolt torque is marked as coming from Campagnolo, so it may not be correct for your frame, bolt and clamp.

Tightening carefully is the best way to go usually,
Jim
-------------------------------------------------

Q: Hi Jim,
I emailed you some time ago in relation to a creaking seat, which I've now managed to solve. FYI, It turns out the Fizik Arione saddle with Ti rails sits on a FSA Carbon K-Force seatpost had gathered dust under the aluminium cradle and was causing the creak. I stripped the seatpost and applied Silicon spray to the area, dried it completely and now presto, no noise.

In any case, Jim I'm emailing you since last week I fell off my bike onto tram lines here in Melbourne, Australia (we have plenty of them). It was a cold and miserable day and I got caught in the rain and my front wheel slipped on the wet track and down I went.

I took the bike to my mechanic. It is a carbon fibre Basso Laguna. The rear derailleur appears to be ok, though the mechanic mentioned that this had been the third time he had to straighten the rear dropout/hanger. He suggested I would need to get a new one, but I can't seem to find one here in Australia. The local distributor is away at the Taiwan bike show and not contactable. Any suggestions? Do you think after 3 alignments, the hanger would need replacing?

Regards,
Tony

A: Happy to hear about your seat (thanks for sharing the tip), but sorry to hear about your crash, Tony. Glad you're okay. The mechanic who fixed the derailleur hanger should have a feel for how weak it is now. They get weaker with each alignment but as long as they stay stiff enough to hold the derailleur steady they will keep working. I would think you could keep
riding with it and in the meantime order a backup so that you can change it out when that comes in. The company I know that makes the best assortment is Wheels Manufacturing. Your bike shop should be able to order from them (they don't sell direct to consumers). You could also order them online at http://www.derailleurhanger.com/

I like to keep a backup on hand for my Cervelo and I'd recommend you get one to be safe should your bike start shifting poorly, a sign that the hanger is too soft and getting bent with every little bump.

Hope this helps,
Jim
-------------------------------------------------